CCTV Systems with Remote Monitoring Capabilities
A step-by-step guide on how to install your own DIY CCTV surveillance system for cost-effective security.
A step-by-step guide on how to install your own DIY CCTV surveillance system for cost-effective security.
How to Install a DIY CCTV Surveillance System
Hey there, security-conscious homeowner! Thinking about beefing up your home's defenses without breaking the bank? You're in the right place. Installing a DIY CCTV surveillance system might sound like a daunting task, but trust me, it's totally doable. Not only will you save a ton of money on professional installation fees, but you'll also gain a deeper understanding of your home's security setup. Plus, there's a certain satisfaction that comes with knowing you did it yourself, right?
This guide is going to walk you through everything you need to know, from picking the right gear to getting it all up and running. We'll cover the essentials, compare some popular options, and even give you a few pro tips to make sure your system is as effective as possible. So, grab a cup of coffee, maybe a notepad, and let's dive into the world of DIY CCTV!
Understanding Your DIY CCTV Surveillance System Needs and Goals
Before you even think about buying a single camera, it's crucial to figure out what you actually need. What are you trying to protect? Where are your vulnerable spots? Are you looking for basic monitoring, or do you need advanced features like facial recognition or license plate capture? Answering these questions will help you narrow down your choices and avoid overspending on features you don't need, or worse, underspending on a system that won't do the job.
Identifying Key Areas for CCTV Surveillance Coverage
Walk around your property, both inside and out. Think like a potential intruder. Where would they try to get in? Common entry points include front and back doors, ground-floor windows, and garage doors. Don't forget about areas where valuables are stored, like a shed or a home office. Consider blind spots in your yard or around your house that could offer cover. Sketch out a rough floor plan or a map of your property and mark these critical areas. This visual aid will be super helpful when planning camera placement.
Determining Your DIY CCTV System Budget and Feature Requirements
DIY doesn't mean free, but it definitely means more control over your spending. CCTV systems can range from a couple of hundred dollars for a basic setup to several thousand for a more advanced one. What features are non-negotiable for you? Do you need high-resolution video, night vision, motion detection, two-way audio, or cloud storage? Prioritize these features based on your security goals. For example, if you live in a well-lit area, super-advanced night vision might not be as critical as it would be for a rural property.
Choosing the Right DIY CCTV Surveillance System Components
Alright, you've got your plan. Now it's time to pick the actual hardware. This is where things can get a little overwhelming with all the options out there. But don't worry, we'll break it down.
CCTV Camera Types for DIY Home Security
There are several types of cameras, each with its own strengths:
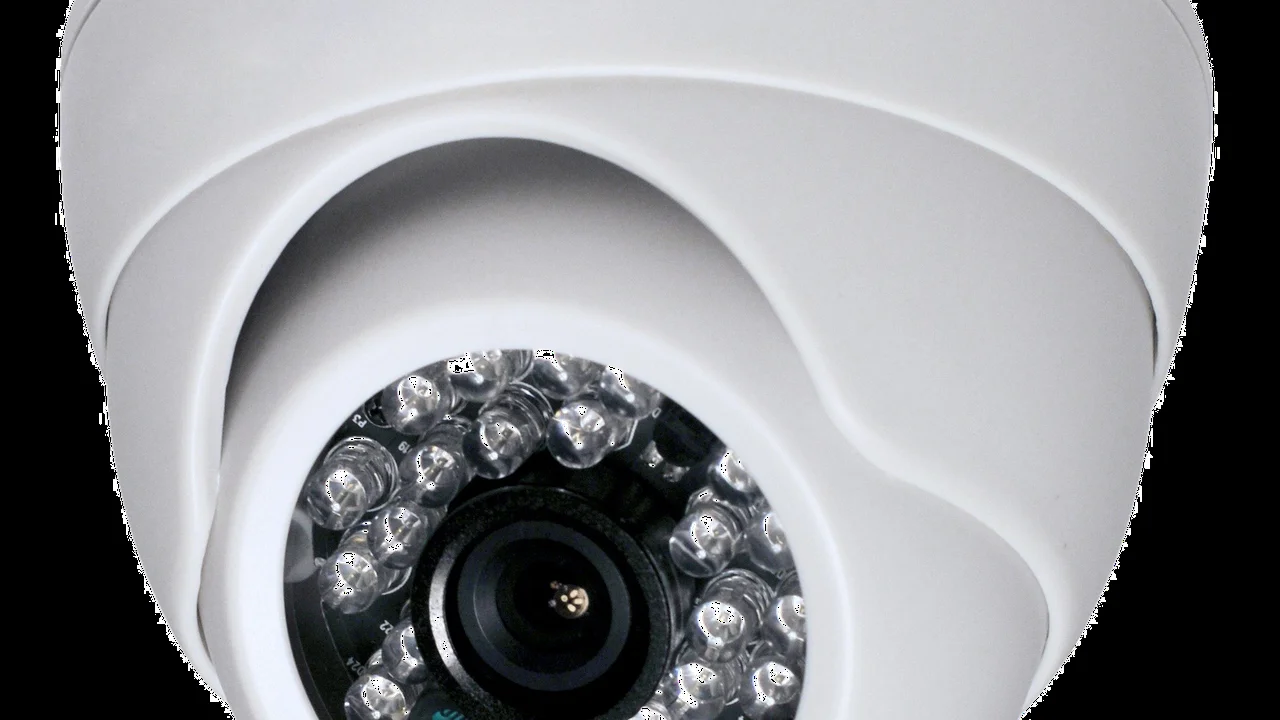
- Dome Cameras: These are discreet and vandal-resistant, making them great for both indoor and outdoor use. Their dome shape makes it hard to tell which way the camera is pointing, which can be a deterrent.
- Bullet Cameras: Easily recognizable, these cameras are often used outdoors. They have a longer range and are highly visible, which can also act as a deterrent.
- PTZ (Pan-Tilt-Zoom) Cameras: These are the big guns. You can remotely control their movement and zoom in on specific areas. Great for covering large areas, but they tend to be more expensive.
- Turret Cameras (Eyeball Cameras): A hybrid between dome and bullet, offering flexibility in aiming without the dome cover. They're often easier to install and adjust.
- Hidden/Discreet Cameras: If you want to monitor without being obvious, these are your go-to. Think cameras disguised as smoke detectors or alarm clocks.
For a typical DIY home setup, a mix of dome and bullet cameras usually works best. Dome cameras for discreet indoor monitoring and bullet cameras for outdoor perimeter surveillance.
Wired vs Wireless DIY CCTV Systems Pros and Cons
This is a big decision point:
- Wired Systems (PoE - Power over Ethernet): These systems use Ethernet cables for both power and data transmission.
- Pros: More reliable connection, less interference, better image quality over long distances, no need to change batteries.
- Cons: More complex installation (running cables), less flexible placement.
- Wireless Systems (Wi-Fi): These connect to your home Wi-Fi network.
- Pros: Easier installation (no cables for data), flexible placement, often battery-powered.
- Cons: Can suffer from Wi-Fi interference, shorter range, battery life can be an issue, potential security vulnerabilities if not properly secured.
For a truly robust and reliable DIY system, especially for outdoor cameras, I'd lean towards wired (PoE) if you're comfortable with the cabling. For indoor cameras or areas where running cables is impossible, wireless can be a good supplementary option.
NVR vs DVR for DIY CCTV Video Recording and Storage
This is about how your video footage is recorded and stored:
- DVR (Digital Video Recorder): Used with analog cameras. It converts analog signals to digital for recording.
- Pros: Generally less expensive, good for upgrading older analog systems.
- Cons: Lower resolution compared to IP cameras, limited scalability.
- NVR (Network Video Recorder): Used with IP (Internet Protocol) cameras. It records digital video directly from the network.
- Pros: Higher resolution (up to 4K), better image quality, more flexible placement of cameras (as long as they're on the network), advanced features like analytics.
- Cons: Can be more expensive, requires a stable network connection.
For a new DIY setup, an NVR system with IP cameras is almost always the better choice due to superior image quality and advanced features. Most modern DIY kits will be NVR-based.
Essential Accessories for Your DIY CCTV Installation
Don't forget the little things! You'll likely need:
- Cables: Ethernet cables (Cat5e or Cat6) for wired systems, power cables for wireless cameras if not battery-powered.
- Mounting Hardware: Screws, anchors, brackets – often included with cameras but sometimes you need specific ones for your wall type.
- Tools: Drill, screwdriver, wire cutters/strippers (for wired systems), ladder.
- Monitor: To view your NVR/DVR interface during setup.
- Hard Drive: For local storage on your NVR/DVR. Make sure it's a surveillance-grade HDD for continuous recording.
- Optional: Weatherproof junction boxes for outdoor cable connections, conduit for protecting outdoor cables, Wi-Fi extenders for wireless systems.
Recommended DIY CCTV Surveillance System Products and Comparisons
Let's talk about some specific brands and models that are popular for DIY installations. Keep in mind that prices can fluctuate, so always check current listings.
Entry-Level DIY CCTV Systems for Basic Home Security
If you're just starting out and want something straightforward, these are great options:
-
Reolink RLK8-410B4-5MP (NVR Kit):
- Description: This is a popular PoE NVR kit that comes with a 8-channel NVR and four 5MP bullet cameras. It's known for its ease of use and solid image quality.
- Features: 5MP Super HD, excellent night vision, motion detection, local storage on a pre-installed 2TB HDD, remote access via app.
- Use Case: Ideal for small to medium-sized homes, covering main entry points, garage, and backyard.
- Pros: Reliable wired connection, good resolution for the price, easy setup for a wired system.
- Cons: Running cables can be a chore, no two-way audio on these specific cameras.
- Estimated Price: $350 - $450 USD.
-
Arlo Essential Spotlight Camera (Wireless):
- Description: While not a full NVR system, Arlo offers excellent standalone wireless cameras that can be grouped. The Essential Spotlight is a great all-rounder.
- Features: 1080p HD video, integrated spotlight, color night vision, two-way audio, motion detection, siren, direct Wi-Fi connection (no hub required for some models).
- Use Case: Perfect for renters, apartments, or supplementing a wired system in hard-to-reach areas.
- Pros: Truly wireless (battery-powered), super easy installation, good app features.
- Cons: Requires cloud subscription for full features (local storage options are limited), battery life needs managing, Wi-Fi dependency.
- Estimated Price: $100 - $130 USD per camera.
Mid-Range DIY CCTV Systems for Enhanced Features and Performance
If you're looking for a bit more oomph, these systems offer better resolution, more advanced features, and greater expandability:
-
Amcrest 4K UltraHD (NVR Kit):
- Description: Amcrest offers robust NVR systems with 4K cameras, providing incredibly detailed footage.
- Features: 4K (8MP) resolution, advanced motion detection, H.265 video compression (saves storage), weather-resistant cameras, remote viewing.
- Use Case: Larger homes, properties where high detail is crucial (e.g., identifying faces or license plates from a distance).
- Pros: Stunning 4K resolution, reliable wired connection, good build quality.
- Cons: Higher price point, 4K footage takes up more storage (though H.265 helps), requires more bandwidth if viewing remotely.
- Estimated Price: $600 - $800 USD for a 4-camera kit.
-
Eufy Security eufyCam 3 (Wireless with Local AI):
- Description: Eufy is known for its wireless, battery-powered cameras with strong local processing capabilities, often avoiding subscription fees. The eufyCam 3 is their flagship.
- Features: 4K resolution, solar charging (for continuous power), BionicMind AI for facial recognition and human/vehicle detection, local storage on HomeBase 3 (expandable), color night vision, two-way audio.
- Use Case: Users who want high-resolution wireless cameras, advanced AI features, and prefer local storage to avoid monthly fees.
- Pros: No monthly fees, excellent battery life (with solar), advanced AI, 4K resolution, easy wireless installation.
- Cons: Higher initial cost, still relies on Wi-Fi, AI features can sometimes be finicky.
- Estimated Price: $500 - $600 USD for a 2-camera kit with HomeBase 3.
Advanced DIY CCTV Solutions for Comprehensive Property Monitoring
For those who want the best possible DIY setup, integrating more professional-grade components:
-
Hikvision or Dahua (Component-based System):
- Description: Instead of a pre-packaged kit, you can buy individual Hikvision or Dahua IP cameras and an NVR separately. These are professional-grade brands often used in commercial settings.
- Features: Wide range of camera types (dome, bullet, PTZ, fisheye), advanced analytics (line crossing, intrusion detection, heat mapping), superior image sensors, robust NVRs with large storage capacities.
- Use Case: Large properties, businesses, users who want maximum customization, reliability, and advanced features.
- Pros: Professional-grade quality, highly customizable, extensive feature set, very reliable.
- Cons: More complex to set up (requires networking knowledge), higher cost, less 'plug-and-play' than consumer kits.
- Estimated Price: Varies widely, but expect $100 - $300+ per camera and $300 - $800+ for an NVR, plus hard drives.
Step-by-Step DIY CCTV Surveillance System Installation Guide
Okay, tools in hand, cameras ready. Let's get this system installed!
Planning Your DIY CCTV Camera Placement and Wiring Routes
Remember that map you drew? Now's the time to refine it. For outdoor cameras, aim for a height of 8-10 feet to prevent tampering but still capture clear facial features. Ensure cameras have a clear line of sight to the areas you want to monitor, avoiding obstructions like trees or bushes. For wired systems, plan your cable runs carefully. Try to follow existing conduits or run cables along eaves, inside walls, or through attics/crawl spaces to keep them protected and out of sight. Measure cable lengths accurately, adding a little extra for slack.
Mounting Your DIY CCTV Cameras Securely
This is where the drill comes in. Mark your mounting holes, pre-drill pilot holes, and use appropriate anchors if drilling into drywall or masonry. Securely attach the camera mounts. For outdoor cameras, ensure they are tightly sealed against weather. Angle the cameras to cover your desired field of view. Don't tighten everything down completely until you've tested the view.
Connecting Your DIY CCTV System Components
For Wired (PoE) Systems:
- Run your Ethernet cables from each camera back to your NVR or a PoE switch.
- Plug the Ethernet cables into the PoE ports on the NVR/switch.
- Connect the NVR to your router using another Ethernet cable.
- Connect the NVR to a monitor (HDMI or VGA) for initial setup.
- Plug in the NVR's power adapter.
For Wireless Systems:
- Ensure your Wi-Fi network is strong in all camera locations. You might need a Wi-Fi extender.
- Follow the manufacturer's instructions to pair each camera with your home Wi-Fi network or a central hub (like Arlo's SmartHub or Eufy's HomeBase).
- Most wireless cameras will require power, either via a power adapter (run a cable to an outlet) or internal batteries.
Configuring Your DIY CCTV NVR or DVR Settings
Once everything is physically connected, power up your NVR/DVR. You'll typically be prompted to set up a password (DO THIS IMMEDIATELY!), time zone, and network settings. The system should automatically detect and display your connected cameras. If not, you might need to manually add them using their IP addresses (check your camera's manual). Configure recording schedules (24/7, motion-activated, or scheduled), motion detection zones, and alert preferences. Make sure your hard drive is recognized and formatted for recording.
Setting Up Remote Viewing for Your DIY CCTV System
This is a huge benefit of modern CCTV. Most NVRs and standalone cameras come with a dedicated mobile app. Download the app, create an account, and follow the instructions to add your NVR or cameras. This usually involves scanning a QR code on the NVR or camera. Once set up, you'll be able to view live footage, review recordings, and receive alerts from anywhere with an internet connection. Test this thoroughly before considering your installation complete.
Optimizing Your DIY CCTV Surveillance System for Performance
Installation isn't the end of the road. A few tweaks can make a big difference in how well your system performs.
Maximizing DIY CCTV Video Quality and Storage Efficiency
Higher resolution is great, but it eats up storage. Most NVRs allow you to adjust resolution and frame rate. You might not need 4K at 30fps for every camera. Consider lowering the frame rate for less critical areas to save space. Also, enable H.265 video compression if your system supports it – it's much more efficient than H.264. Regularly check your hard drive's health and ensure it's not getting too full.
Fine-Tuning DIY CCTV Motion Detection and Alert Settings
False alarms are the bane of any security system. Spend time adjusting your motion detection zones to exclude areas with constant movement (like a busy street or swaying tree branches). Adjust sensitivity levels. Many systems allow you to set different sensitivity for day and night. If your cameras have AI features (human/vehicle detection), enable them to significantly reduce false alerts from animals or shadows.
Ensuring Network Security for Your DIY CCTV System
Your CCTV system is connected to your home network, making it a potential entry point for hackers if not secured. Always change default passwords on your NVR/cameras. Use strong, unique passwords. Keep your NVR/camera firmware updated. If your router has a firewall, ensure it's enabled. Consider creating a separate VLAN (Virtual Local Area Network) for your IoT devices, including your cameras, to isolate them from your main network.
Troubleshooting Common DIY CCTV Surveillance System Issues
Even with the best planning, things can go wrong. Here are some common hiccups and how to fix them.
Addressing DIY CCTV Camera Connectivity Problems
No Picture/Offline Camera:
- Wired: Check the Ethernet cable connection at both the camera and NVR/switch. Ensure the PoE port is active. Try a different port or cable. Check if the camera is receiving power (some have indicator lights).
- Wireless: Check your Wi-Fi signal strength at the camera location. Reboot your router and the camera. Ensure the camera is within range and not experiencing interference. Re-pair the camera with your Wi-Fi or hub.
Resolving DIY CCTV Video Quality and Recording Issues
Blurry or Grainy Footage:
- Clean the camera lens.
- Check the camera's focus (some have manual focus rings).
- Ensure the resolution settings are appropriate for your needs.
- For night vision, ensure there are no obstructions reflecting the IR light back into the lens.
No Recording:
- Check if the hard drive is properly installed and formatted in the NVR/DVR.
- Verify your recording schedule is correctly set up.
- Ensure motion detection is enabled and configured if you're relying on it for recording.
- Check if the hard drive is full (most systems will overwrite old footage, but check settings).
Dealing with DIY CCTV False Alarms and Notifications
This is usually a sensitivity issue. Go back into your NVR/app settings and:
- Adjust motion detection zones to exclude areas with irrelevant movement.
- Lower the motion sensitivity.
- If available, enable human/vehicle detection or other AI features.
- Check for spiderwebs on outdoor cameras – they love to trigger motion!
Maintaining Your DIY CCTV Surveillance System for Longevity
Just like your car, your CCTV system needs a little TLC to keep running smoothly.
Regular Cleaning and Inspection of DIY CCTV Cameras
Periodically clean your camera lenses, especially outdoor ones, to remove dust, dirt, and spiderwebs. Check for any loose cables or mounts. Inspect outdoor cameras for signs of weather damage or corrosion. Make sure nothing is obstructing the camera's view.
Updating DIY CCTV Firmware and Software
Manufacturers regularly release firmware updates for NVRs and cameras. These updates often include bug fixes, performance improvements, and crucial security patches. Check your NVR's settings or the manufacturer's website for available updates and install them promptly. Similarly, keep your mobile app updated.
Backing Up Important DIY CCTV Footage and Data
While your NVR records locally, consider backing up critical footage to an external hard drive or cloud storage, especially if it's evidence of an incident. Most NVRs have options to export footage via USB or network. Don't rely solely on your local hard drive for irreplaceable video.
There you have it! Installing a DIY CCTV surveillance system is a rewarding project that can significantly boost your home's security. It takes a bit of planning and effort, but the peace of mind and cost savings are definitely worth it. Happy monitoring!
:max_bytes(150000):strip_icc()/277019-baked-pork-chops-with-cream-of-mushroom-soup-DDMFS-beauty-4x3-BG-7505-5762b731cf30447d9cbbbbbf387beafa.jpg)